
Almost no product starts at a hundred thousand pieces. It starts at forty samples, then a few hundred for a launch, then a few thousand while the market decides. The tooling question in that window is not "how do we make this part cheapest" — it is "how do we make it well enough, soon enough, without spending on a tool we may have to change". Getting that wrong is expensive in both directions, and the two mistakes cost roughly the same.
What low volume actually means
"Low volume" is not a number, it is a position in a project’s life. The same 3,000 parts can be the end of a product or the first month of it, and those two situations want opposite tooling. Before comparing quotations, place yourself on one of three lines.
- Validation volume, roughly 10 to 500 parts. The purpose is to hold the part, fit it, show it, and find out what is wrong with it. Nobody is selling these parts.
- Bridge volume, roughly 500 to 10,000 parts. The product is real and shipping, but the final tool is either not built yet or not justified yet. These parts go to customers, so they have to be the real resin, the real color and the real specification.
- Low-volume production, roughly 10,000 to 50,000 parts a year, sustained. This is not a phase, it is the business model — spare parts, medical devices, industrial equipment, anything made in variants rather than in millions.
Each of these has a different correct answer, and the second one is where most of the money is lost. A validation run done on a production tool is overcapitalized; a bridge run done with 3D printing and sold as production is a quality problem waiting for a customer complaint.
The most common failure at quotation stage is a buyer sending a quantity without saying which of these three they are in. A supplier reads 3,000 pieces as a production order and quotes a steel tool that cannot be justified. Say what the number is for, and the recommendation changes.
The four routes, honestly compared
There are four ways to get a plastic part, and they are not steps on a ladder — they overlap. Knowing where each one stops being sensible is the whole decision.
| Route | Typical batch | Tooling cost | Part cost | Lead time | What it is good at |
|---|---|---|---|---|---|
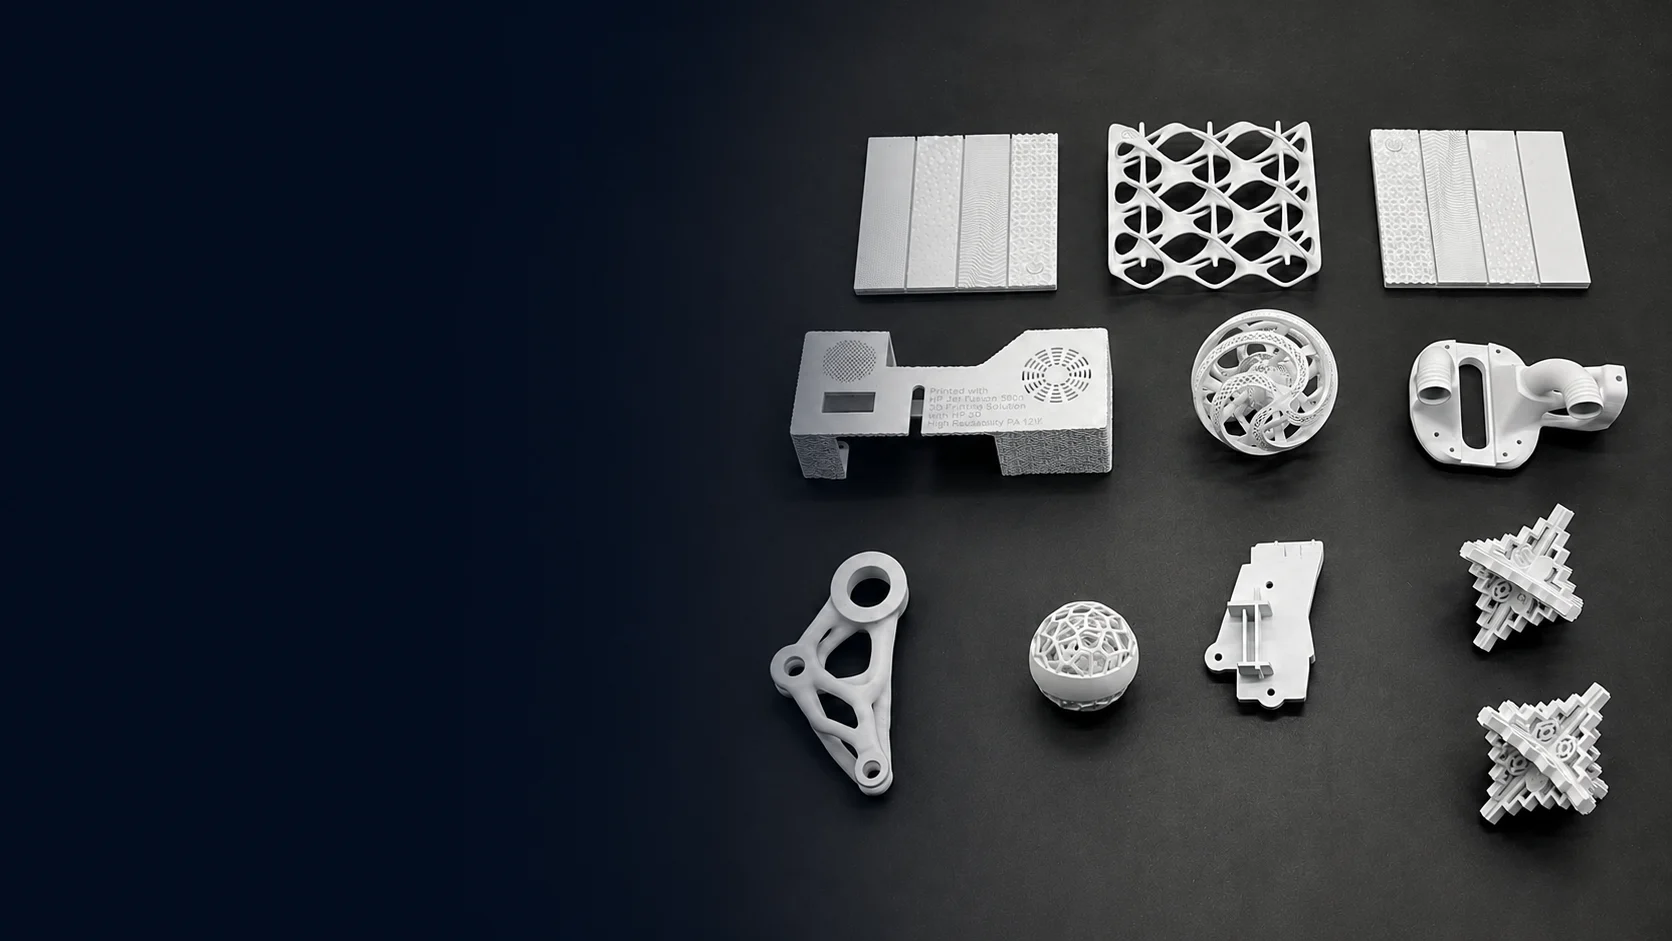
| 3D printing (SLS, MJF, SLA, FDM) | 1–50 parts | None | Highest per part | Days | Proving geometry, fit checks, jigs, trade-show units. No tool, no draft, no gate |
| Vacuum casting (silicone mold) | 10–200 parts | Lowest | High | 1–2 weeks | Small runs of a castable resin, good surface, useful for color and finish approval |
| Aluminum tool | 500–50,000 parts | Roughly 40–55% of a steel tool | Close to steel | 3–6 weeks | Real resin, real process, real part. The default answer for bridge and market-test volume |
| Steel tool | 50,000 parts and up | Reference | Lowest per part | 6–14 weeks | Full production, tight tolerance, abrasive resins, long service life |
The important line in that table is the aluminum one. An aluminum tool is not a "cheap steel tool". It is a different instrument: it runs the same machine, the same resin and the same process as production, but the mold itself is a wear item with a known, finite life. That is why it dominates the bridge window — the parts are genuinely production-representative, and the tool is allowed to be temporary.
Vacuum casting is worth a mention because it is often skipped. A silicone mold with a polyurethane resin gives you ten to twenty parts with excellent surface detail in about a week, at a tooling cost that barely registers. What it does not give you is the real resin, so mechanical properties and shrinkage are wrong. For appearance models and color approval it is the fastest route that exists; for anything that will be drop-tested, it is misleading.
The same caution applies to 3D printing, and it is the boundary most often crossed by accident. Printed parts are the fastest way to prove geometry, find an interference, and hold a prototype in front of a customer — which is exactly what rapid prototyping is for. What they are not is a preview of injection molding: layer lines, anisotropy, no draft, no gate, and a material that behaves differently from the resin you will eventually specify. A design that only works when printed is a design that has not been checked for molding, which is a DFM question rather than a printing one.
Where the tooling cost sits inside a full quotation is broken down in what drives the price of an injection mold. The difference between aluminum and steel is mostly in the cavity material, the heat treatment and the finishing time, not in the design or the machining hours.
Where the crossover really sits
The crossover is the quantity at which the money spent on a better tool equals the money saved per part. It is arithmetic, and it can be done without knowing anyone’s prices, because the answer depends only on two ratios.
Let the steel tool cost be S, the aluminum tool cost be A, and the per-part cost be c for steel and c × k for aluminum. Total cost for n parts is A + nkc against S + nc. Setting them equal:
Break-even n = (S − A) / (c(k − 1))
With aluminum at 45–55% of steel tooling, that simplifies to roughly 1.8 to 2.2 times (S / c) — and S/c is simply "how many parts the steel tool costs".
| If steel tooling costs this many part prices… | and the aluminum part costs… | break-even lands at about | in practice, that means |
|---|---|---|---|
| 3,000× | +30% | 5,500 parts | Aluminum wins below roughly five thousand pieces |
| 5,000× | +30% | 9,200 parts | A classic bridge-tooling case: order 3,000 now, tool steel later |
| 5,000× | +15% | 18,300 parts | Only if you genuinely expect to stop at five figures |
| 8,000× | +30% | 14,700 parts | Complex steel tool; aluminum stays attractive much longer |
| 1,500× | +30% | 2,750 parts | Simple steel tool; the case for aluminum is weak |
Two things about that table surprise people. First, the break-even is usually far lower than intuition suggests, because the per-part gap between aluminum and steel is small — often under 30% — so the tool cost difference dominates. Second, the interesting variable is not the tool cost ratio, it is S/c, and that is driven by part complexity rather than by part size. A simple steel tool with few operations may cost the equivalent of 1,500 parts; a complex one with slides, hot runner and inserts can cost the equivalent of 8,000.
The question to ask, in this order
- What is my total spend at the quantity I actually expect? Not the quantity you hope for. Use the pessimistic case first — tooling decisions that only work in the optimistic case are how projects end up paying twice.
- How likely is a design change after the first samples? If likely, aluminum wins regardless of volume, because a steel tool revised twice erases the savings entirely. This is also the argument for doing the DFM review before either tool is quoted — changes found on paper are free, and changes found on steel are not.
- What does a second tool cost if the first one is wrong? This is the real risk number, and it is rarely written down.
There is also a false economy worth naming: choosing aluminum for 30,000 parts because the per-part price looked close, then replacing the tool at 12,000 shots and paying for both tools plus the downtime. The crossover table above assumes the aluminum tool survives the quantity. It does not, if the quantity exceeds its rating.
Aluminum tooling: limits, not myths
Aluminum has a reputation problem in both directions. Some suppliers dismiss it as a toy; others sell it as a universal substitute for steel. Both are wrong. The honest position is that aluminum is excellent within a defined envelope, and the envelope is set by pressure, abrasion and heat rather than by shot count alone.
| Aluminum tooling handles this well | It struggles with this | It cannot do this at all, realistically |
|---|---|---|
| Wall sections of 1.5 mm and up | Thin walls below about 1.0 mm, where injection pressure climbs | Abrasive fills above roughly 20–30% glass fiber |
| Simple two-plate tools, single cavity | Multi-cavity layouts above four cavities | Very high clamp forces on large projected areas |
| Low to medium viscosity resins: ABS, PS, PP, PE, PC/ABS | High-viscosity engineering resins at tight tolerance | Corrosive melts without a protective coating or insert |
| Cosmetic parts at standard texture | High-polish optical surfaces, where aluminum scratches and dulls | Long thin cores and slender unsupported features |
| Bridge production while the steel tool is being built | Runs that will exceed the tool’s rated shot count | Slides and lifters in highly loaded positions |
| Design iterations, where pockets can be welded and recut | Repeated recutting after the third or fourth change | Any application where a failure stops an assembly line |
The number that matters is pressure, not parts
Aluminum is roughly a third as stiff as steel. Under clamp force, an aluminum cavity plate deflects about three times as much as a steel plate of the same thickness. Deflection at the parting line means flash; deflection in the cavity means a part with a heavy center and thin edges. That is why the failure mode of an over-driven aluminum tool is not a crack — it is flash appearing everywhere at once and never coming back under control.
The practical implication: for the same part, an aluminum tool usually needs thicker support plates, more support pillars, or a smaller projected area per cavity than the steel equivalent. A supplier who simply copies the steel tool design into aluminum has removed the material and kept the geometry, and the tool will show it within a few thousand shots.
Life is a range, not a promise
Published figures for aluminum tool life run from 5,000 to 100,000 shots, and the spread is real — it reflects resin, wall section, gate design, and whether anyone is maintaining the tool. For planning purposes, treat the conservative end as your assumption and ask the supplier what they are warranting in writing. A warranty stated in shots is meaningful; "long life" is not.
One design decision changes the number substantially: put steel inserts where the wear happens. Gate areas, core pins, and any sharp cavity edge can be insert steel in an aluminum frame at modest cost, and those inserts take most of the punishment. This hybrid is very common in bridge tools and is the single most useful upgrade available.
Which resins tolerate an aluminum tool
The resin choice can rule aluminum out entirely, and it is usually decided before anyone thinks about tooling. If the part must be glass-filled PA66, the conversation about aluminum is already over.
| Resin | Suitability | Why |
|---|---|---|
| PP, PE, HDPE | Excellent | Low viscosity and low molding temperature, so cavity pressure stays modest. The most forgiving family for aluminum |
| ABS, HIPS, ASA | Excellent | Wide processing window and mild wear. Standard choice for cosmetic enclosures in bridge tools |
| PC/ABS, PC | Good | Higher temperature and pressure, but workable if wall sections are sensible and the tool is properly supported |
| POM | Fair | Low viscosity but tends to flash, and it is dimensionally demanding. Aluminum plate stiffness becomes the limiting factor |
| PA6, PA66 unfilled | Fair | Hot and fluid; watch gate wear and part warpage rather than the tool itself |
| PA with 30% glass fiber | Poor | Abrasion erodes gates and cavity edges quickly. Steel inserts at the gate are the usual compromise |
| PVC (rigid) | Poor | Releases hydrogen chloride, which attacks aluminum. Needs corrosion-resistant steel |
| PMMA, transparent PC | Poor | Aluminum does not hold the polish level optical parts need, and any scratch becomes a visible defect |
| PPS, PEEK, PEI | Not advised | High melt temperature and pressure belong in hardened steel, not in aluminum |
The pattern behind that table is simple: aluminum dislikes heat, pressure and abrasion, so the resins that work are the ones that mold cool and slow. PVC on aluminum is the one to flag explicitly, because it is not a wear problem — hydrogen chloride from the melt corrodes the cavity surface, and a corroded cavity cannot be polished back. If a project calls for rigid PVC, the tool has to be steel, usually a corrosion-resistant grade, and the same caution applies to any halogenated flame-retardant compound.
For the steel side of this decision, including which grade suits which resin, see the injection mold steel comparison.
The middle path: soft steel, production intent
There is a third option that is often overlooked because it does not fit neatly into "cheap tool" or "production tool": a pre-hardened steel tool built with a single cavity, simplified cooling and no automation, but made of the same steel and to the same standards as the eventual production tool.
Why it is worth considering:
- It can run the abrasive resins that aluminum cannot, so a glass-filled part does not force you into a full production tool on day one.
- Its cavity is reusable. In many designs the single cavity insert can be lifted out and used as one position in a later multi-cavity tool, or kept as a spare.
- It holds tolerance properly, so the samples you approve are genuinely representative of the parts you will ship at volume.
- It can be a stepping stone in the same tool base — the same frame later carries a multi-cavity layout, which shortens the second build considerably.
The trade-off is cost and lead time: this route typically sits above aluminum on both. It earns its place when the part is technically demanding but the volume is not yet committed — the situation where aluminum is too weak and a full production tool is too much of a bet.
This is also the route that makes sense when the customer is a regulated one. Medical and automotive programs often will not accept parts from an aluminum tool as production-representative, no matter how good the sample looks, because the process validation has to run on the material that will ship. If that is your situation, the decision is made for you, and it is better to know at quotation than at audit.
Not sure which tool your volume justifies?
Send us the part drawing, the resin and the quantity you actually expect — including the pessimistic case. We will tell you which of the four routes we would take and why, and we will say plainly if a cheaper route would do the job.
Four things that decide the route
Volume is only the first variable. Three others routinely override it, and a recommendation that ignores them is a guess with a table around it.
1. Part weight and projected area
Clamp force scales with projected area, and projected area is what aluminum cannot handle. A small, deep part in a heavy wall is easy for aluminum. A large, flat panel with a modest weight is hard, because the force acts over a big area and the plate flexes. As a rough screen: aluminum is comfortable with parts under about a kilogram and projected areas under a few hundred square centimeters per cavity, and increasingly uncomfortable beyond that.
2. Cosmetic standard
A textured surface etched into aluminum wears smooth across the flow path within a few thousand shots, and the difference is visible as a gloss gradient on the part. A high-polish surface on aluminum picks up scratches that transfer to every part afterward. Either the texture goes into a steel insert, or the tool goes steel. This is not negotiable with polishing.
3. Tolerance and the assembly
Aluminum tools can hold good tolerance; they just hold it for fewer shots before drift. If the part is a single component judged on its own, that is fine. If it is one of four parts that must fit together with a small stack-up allowance, drift in one part becomes an assembly reject in another, and the arithmetic gets ugly quickly.
4. The regulatory and customer context
Some customers specify tool material contractually, and some industries effectively do. Ask before designing: a tool that has to be replaced because a customer’s quality manual says "hardened steel cavity" is an expensive discovery at the audit.
| Your situation | Recommended route | The reason that decides it |
|---|---|---|
| Kickstarter or first market test, 500–2,000 units | Aluminum, single cavity | You need real resin and real process, and you do not yet know whether the design will change |
| Design still moving, three revisions expected | Aluminum, and plan for it | Aluminum can be welded and recut cheaply. A steel tool revised three times is a different budget |
| Volume committed at 100,000 per year | Steel, now | Per-part saving pays the tool back inside a year, and the aluminum replacement cost is pure waste |
| Large part, over 2 kg | Steel, or aluminum with steel inserts | Clamp force and plate deflection scale with projected area; aluminum plates flex |
| Visible textured housing | Steel, or aluminum with a steel texture insert | Texture etched into aluminum wears smooth within a few thousand shots |
| Bridge order while a steel tool is in build | Aluminum, designed from the steel part data | Both tools run the same part; only the tool material differs. Insist on identical gate position |
| 50 units for a trade show next month | 3D printing or vacuum casting | A tool is not worth building. Surface finish is the only real compromise |
| Glass-filled structural bracket | Steel | Gate erosion and cavity wear on aluminum will show up within the first production run |
Note how often the answer turns on information the buyer already has rather than on the supplier’s capability. Volume, wall section, cosmetic standard and the customer’s own quality manual are all fixed before a quotation is requested. The tooling conversation is mostly about getting those four facts onto the table early enough that the recommendation is built on them instead of on a habit.
If the part is new and the design is still open, the cheapest intervention is upstream: a review that moves a gate, thickens a rib or removes an undercut before any steel is cut. That work sits inside custom plastic injection molding services, and it is far less expensive than discovering the same issue at trial.
Eight mistakes that cost real money
- Quoting volume without saying what it is for. The single most common cause of a mismatched tool. "3,000 pieces" and "3,000 pieces for a launch, then 80,000 a year" are different projects.
- Running aluminum past its rated life. The tool does not fail dramatically; it starts flashing, then it starts cracking. Both happen mid-order, with customers waiting.
- Approving an aluminum tool with a steel tool’s acceptance criteria. If the acceptance test demands capability over 500 consecutive shots, make sure the tool was built to deliver it. The criteria and the tool must match.
- Forgetting that a bridge tool and the production tool must share a gate position. Different gate location means different weld line, different shrinkage pattern, different part. Components made on the two tools will not be interchangeable.
- Choosing aluminum for a glass-filled part to save tooling cost. The gate erodes, the part grows, and the saving is spent on sorting.
- Treating the aluminum tool as disposable and therefore undesigned. A cheap tool still needs proper cooling layout and venting. Skimping there produces a tool that cannot hold a cycle, which costs more per part than the steel tool would have.
- Not asking who owns the tool. Especially on bridge tools built quickly: get the ownership and the data package in writing, or you may find the tool cannot be moved.
- Assuming the low-volume route is the fast route. Aluminum is faster than steel but still 3 to 6 weeks. If the deadline is a month away, the answer is 3D printing or vacuum casting, not a tool.
How to structure the order
The most reliable way to spend the least on tooling overall is to buy in stages, and to make each stage prove something the next one depends on. This is also how to keep the option of changing your mind, which is worth more than a marginal per-part saving at low volume.
| Stage | Quantity | What you are buying, and what to lock down before you pay |
|---|---|---|
| Sample | 20–50 | Proof that the tool produces a conforming part. Approve it against the drawing, the texture plaque and the assembly check, not against a photo |
| Pilot | 200–1,000 | Proof that the process repeats. Ask for the run chart, and for the parts to be packed the way production will be packed |
| Bridge | 1,000–10,000 | Revenue while the steel tool is in build. Lock the gate position to the steel tool design so the parts stay interchangeable |
| Production | 10,000 and up | Steel tool, and the handover package that lets anyone else run it — see what to collect at mold trial |
Two clauses are worth writing into the purchase order regardless of stage. The first is tool ownership and data: the tool is your property, and you receive the 3D data, the drawings and the parameter card. Without that, a "cheap" tool becomes an expensive dependency, and the second-source quotation you will eventually want becomes impossible to obtain on equal terms.
The second is the definition of what happens at the end of the rated life. If the aluminum tool is expected to deliver 20,000 shots and your order is 18,000, ask now what the plan is for shot 20,001 — a replacement cavity insert, a new tool, or a switch to steel. Deciding that in advance is a line in a document; deciding it in a hurry is a production stop.
If you are also comparing suppliers at the same time, the questions in how to vet a molding supplier apply with extra force here, because a supplier who cannot explain why they recommended a particular tool material is a supplier who recommended it by habit.
What to ask a supplier before you commit
Six questions separate a considered recommendation from a generic one. The answers should be specific to your part, and a supplier who answers them without looking at your drawing has not looked at your part.
- "What shot count are you warranting on this tool, and in writing?" A number, not an adjective.
- "What is the projected area per cavity, and what clamp force does that require?" This tells you whether the tool has been sized or merely drawn.
- "If I double the quantity, does your recommendation change?" A good supplier will say yes and explain where the line is. A weak one will say no.
- "Which parts of this tool are steel inserts, and why those?" Gates and high-wear edges should have an answer.
- "What is the cooling layout, and what cycle time does it support?" At low volume the cycle matters less for cost than for capacity — but a tool that cannot hit the quoted cycle will miss the delivery date.
- "What is included in the price, and what is charged as a change?" Especially the number of trials and the definition of a design change.
One further question is worth asking even though it feels awkward: "would you build this in aluminum if it were your money?" The answer, and how quickly it comes, tells you whether you are talking to someone who has actually run both kinds of tool.
The costs nobody quotes
Tooling and per-part price are the two numbers on the quotation. Four other costs decide whether the low-volume route actually saved anything.
- Sorting and rework. A tool running near its limit produces a rising reject rate, and rejects at a low-volume supplier are usually sorted by hand rather than scrapped. That labor is real and rarely appears in the piece price.
- The second tool. If the first tool’s life ends before the order does, you pay for two tools and the transition. This is the single largest risk of over-reaching with aluminum.
- Design change cost. Cheap to do in aluminum, expensive in hardened steel. If your design is still moving, this cost is not hypothetical — it is scheduled.
- Time to the next stage. A bridge tool that takes 5 weeks and a steel tool that takes 12 means the steel tool should have been ordered before the bridge parts ran out. Projects lose more time to sequencing than to machining.
The right way to compare two quotations is total cost to the quantity you actually expect, including the probability of a design change and the probability of needing a second tool. Most buyers compare tooling price plus piece price at the quoted volume, which systematically favors the wrong answer at both ends of the range.
Frequently asked questions
How many parts make aluminum tooling worth it?
Most bridge-tooling cases land between 500 and 20,000 parts, with the break-even usually somewhere between 3,000 and 10,000 depending on how complex the steel tool would be. The useful way to decide is not a rule of thumb but the break-even calculation: aluminum tool cost divided by the per-part saving, adjusted for the risk of a design change. A supplier who quotes aluminum for 40,000 parts without asking about the design’s stability is guessing.
Can an aluminum tool produce parts identical to a steel tool?
Functionally, usually yes — same resin, same machine, same process, so the parts are production-representative in material and appearance. The differences appear at the edges: aluminum runs slightly differently because heat transfer is faster, so cooling times and sometimes warp behavior differ, and fine texture or polish will not match as closely. For most industrial and consumer parts this is irrelevant. For optical parts and Class A surfaces it is not.
Is a bridge tool a waste if we already know we will go to steel?
No, if it earns revenue or protects a launch date — that is exactly what a bridge is for. It is a waste if it is bought to avoid a decision: the money spent on it is not recovered, and if the design later changes, the bridge parts may not match the production tool. The test is whether the bridge buys you something specific — time, cash flow, or market information. If it buys none of those, order the steel tool and wait.
What is the difference between a prototype tool and a bridge tool?
A prototype tool exists to answer questions about the design; the parts are not for sale and are often deliberately rough. A bridge tool exists to supply real customers while the production tool is built, so the parts must meet the full specification, including packaging and traceability. Confusing the two is how companies end up shipping prototype-quality parts, and it is a common problem when the schedule slips and the "sample tool" quietly becomes the supply tool.
Do I need a hot runner on a low-volume tool?
Usually not. At low volume the runner scrap is small in absolute terms, and a hot runner adds cost, another failure mode and a controller. The exception is a part where the runner cannot be tolerated for cosmetic or assembly reasons, or a resin where the regrind is not acceptable. The full comparison of what a hot runner does and does not buy you is in hot runner versus cold runner.
How long does an aluminum tool take to build?
Typically three to six weeks for a straightforward single-cavity part, against six to fourteen for a comparable steel tool. The saving comes from softer machining and no heat treatment, not from skipping steps — so if a quotation promises aluminum tooling in ten days, ask what is being left out. Design, machining, spotting, polishing and trial all still have to happen, and the trial is usually the item that gets compressed, which is exactly the wrong one to rush.